Start A Blog In Any Niche For 2023
Introduction
In this 7-STEP Guide, I will show how easy it is to Start a Blog and/or Niche Specific Website. The Steps are easy to follow, an you can have a live Website in less than an hour. I will show you a variety of products and services I use and list the pro’s and con’s of each one. I want to give you as many choices while maintaining the simplicity of Blog creation;

The only difference here is I won’t commit you to only one product. I tested out and used the other popular Hosting and WordPress Themes. The ones I am discussing today are the simplest and easy to use. I have also provided other products such and BlueHost and Namecheap as other alternatives throughout the website.
I tested different Hosting Companies, different Themes, and various plugins. Some worked well for me while some work well for others. I will be suggesting I ones I currently use and provide examples. I will also provide alternatives so you can see what works for you.
This page contains affiliate links, meaning I get a commission if you decide to make a purchase through my links. I only link to products that I have used myself and wholeheartedly recommend. Thank you for your support.
Start a Blog Now In 7 Easy Steps
FIRST: Choose a Domain Name
A DOMAIN NAME is what you usually see in the browser after visiting a particular website. It is what gives a website its identity. For example, for Google.com, Google is the domain. For Amazon.com, Amazon is the domain, and so on.
Why choosing the right Domain Name is Important
Choosing the right name is important for your Blog. The name represents you and your identity. Where its personal or for business, it’s an important reflection of who you are. At the same time, you want something catchy and stands out. Something easy to say that “rolls” off the tongue.

I would recommend that you take your time. Put together different combinations of ideas.
If you cannot find any ideas, you can always use a domain generator to help you find some. at https://domainwheel.com/
You need to choose a domain name, which is simply your website’s URL. There are many types of domain extensions, but I usually stick with the.COM at first, but if it not available there are other ones I can get with a different extension.
Domain Companies Include: NameCheap. GoDaddy. BlueHost, Google and domain.com
When I create a new website, I buy my domain from a different company which is separate from my hosting. You can below why I choose this method.
If you are NEW to Blogging and want to buy the Domain and Hosting together you have that option too. There are a couple of benefits such as a free domain name when you purchase hosting and having help and support from the hosting company without dealing with a third party.
5 Reasons to keep your Hosting and Domains separate
1. If you have the Domain and Hosting together, the Hosting company can Hold your domain “hostage” If you have discrepancies with billing then that hosting company can LOCK down your website.
2. If you do not like your Hosting companies or their service, you can always switch companies. For example, I did not care for HostGator and I moved my domains to GreekGeeks. All I had to do was change the DNS entry (discussed below) and the Green Geeks took care of all my data transfers.
3. If you have several domains, you have more control of your domains with different companies.
4. Keeping future or potential problems separate. Maybe your existing company gets bought out or goes bankrupt. At least your domain will be safe.
5. Potential Hacks on the Hosting Company or website. You will minimize risk when you have them separate.
If you plan on having Multiple Domains, you might consider a Reseller Hosting Account

Method 1: Buying HOSTING & DOMAIN together
When you buy Hosting with GreenGeeks, you get a FREE Domain with your purchase. This is a good option for beginners and keeps everything all together. I highly recommend this for the beginner. When you get comfortable and want to buy more domains, go to METHOD 2 and see how you can keep Domain Names and Host separately.
Method 2: Buying a Domain Name and Hosting separate
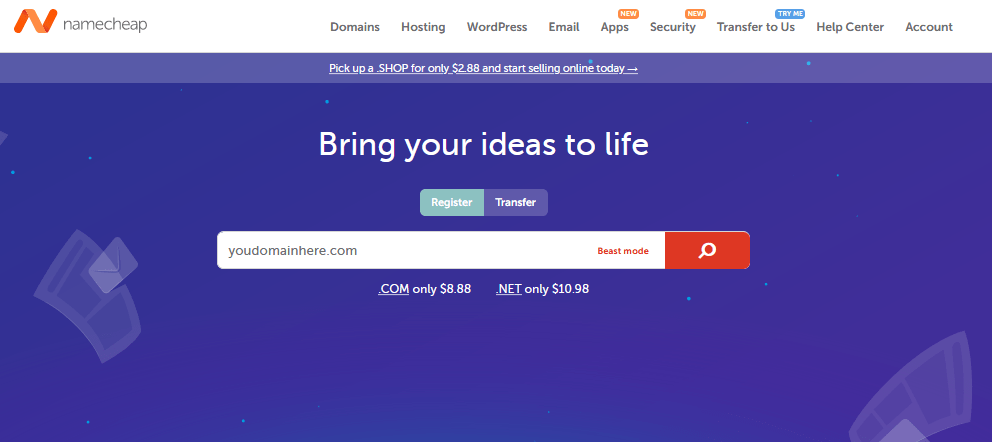
I use Namecheap.com to buy all domains, and I keep domains and the hosting separate. I used three different hosting companies, and it was easy to change the hosting because I kept all my domains separate. All you need to change is the DNS entry. See below on how to change DNS Entry
For this example, I choose the domain: youdomainhere.com – luckily it was available
Here is the domain that was available. As you can see other domain extensions were available and you can see all the different prices

If the domain was not available then it will tell you and give alternate suggestions as you can see.
Once you have chosen a domain, go to checkout and purchase the domain and you’re ready to begin.
SECOND: Choose a Hosting Company
HOSTING refers to the company which houses your website on the internet for people to access it. Picture it as an online computer drive, where your blog and all its files will be saved.
I am currently GreenGeeks, because the Help and Support are Excellent. They usually respond in minutes. The Pricing is VERY competitive, the SPEED is comparable if not faster than the “other” popular Web Hosting companies. I have had excellent and immediate service calls with issues to the website or something as simple setting TXT records to Google Analytics or Social Media Verification.
They are also more ECO Friendly, leave less of a carbon imprint (which is important to me)

Why Choosing Good Hosting Is Important
With any website you might be building, HOSTING is equally as important as the website itself. It is the foundation of your business and selecting a good Hosting is a good investment.
A Few Reasons why I chose GreenGeeks:
- Industry Leading Green Web Hosting. 100% Green with Zero Carbon Footprint
- 100% Customer Satisfaction Rate
- Enterprise Network, Servers & 99.9% Uptime
- Fully Featured Web Hosting Services
GreenGeeks Mission Statement


Once you selected a Domain Name and a hosting company, it is time to link the two together. I will use NameCheap and GreenGeeks as an example. You will need to change the DNS entry on your domain name and change the Nameservers.
IF YOU BOUGHT THE DOMAIN AND HOSTING TOGETHER, YOU CAN SKIP TO THE NEXT PART: INSTALLING WORDPRESS
I am assuming if you are reading this section, you have bought the Domain and Hosting separately. I will show you how simple it is to connect the two together.

- First: Login in the NameCheap (or the place you bought your Domain from) and look for your domain list – see image below
- Second: Then you will click on the manage button
- Third: Under Nameservers select CUSTOM DNS and add your Nameservers from your hosting company.

DNS entry: DNS stands for “Domain Name System”. It’s a system that lets you connect to websites by matching human-readable domain names.
Nameservers associate your domain name with your web host. Think of it as a map of the geographic location of your website. Like the traditional Post Office mail will have the city, state, and zip code, the Name Server is the location of the server where your site files are stored. Your domain name acts as the actual address at that location.
GreenGeeks Nameservers:
chi-ns1.greengeeks.com
chi-ns2.greengeeks.com
THIRD: Install WordPress
Now that you have the hosting and the domain connected, it’s time to install WordPress. As you can see, in the control panel or c Panel you’ll find that WordPress can easily be installed with one click. A couple of minor changes in the WordPress title, Admin Name, and Password.

First Login into your GreenGeeks account and click on CPanel, which will bring you to this screen.

INSTALLING WORDPRESS FROM YOUR CONTROL PANEL
- In your control panel, go to software and click on Softaculous App Installer. (see image)
- Choose a Login Name and Password wisely (I suggest an auto-generated password)
- Choose a THEME you would like at the bottom. (Select GeneratePress)
- Install WordPress. From the Softaculous script window, click the “Install Now” button in the description.
- You’re done! You have a fully functioning WordPress Blog
WORDPRESS SITE CUSTOMIZATION’S
Now that you have your basic theme setup, there are a couple of “tweaks” you need to do before your get started.
- First, go to your plugin tab and delete all unnecessary plugins
- Delete the “Hello World” Article
- Change the Categories to tailor your Website
You want to change how your view your URL.

FOURTH: Choose a WordPress Theme
A WordPress theme is a tool to change the layout and design of your website. This allows you to customize the appearance of your website, which includes the layout, typography, color, and other design elements.
Free and Paid themes
There are tens of thousands of blog themes available for WordPress blogs. My only word of advice is to choose one that is regularly updated for holes in security, as you do not want to get your blog hacked with a poorly designed template.
WordPress says that all themes are free, but they give you limited capabilities to the theme.
I recommend Generate Press as a starter theme. There is a free version available which is fine for the beginner. It is very user-friendly and will show you how you can easily customize WordPress. They have great support and tons of tutorials on YouTube.
Generate Press also has a paid theme, which has more customizable features. When you upgrade to the paid theme, you also have access to their theme library, which has many “pre-made” themes. They also have Woo Commerce integrations if you want to start an online store.
Generate Press

MyThemeShop Overview
The second theme of a set of themes I recommend is MyThemeShop. I really like the styles and layout of their themes. They are more specific and already done for you. All the graphics, templates are already made for you. There is a lot of support and tutorials for each theme.

CLICK HERE FOR DEMO OF ALL THEMES
Summary
Mythemeshop was the first theme I purchased. At the time, I was looking for a great template that was not difficult to customize. It was fast and looked sharp. When you purchase it, WordPress provides you with all the documentation to help assist in making your theme unique. They also have a wide variety of paid themes for a reasonable price.
Page Builders
Once you have a base theme, you can always build a website from scratch using a Page Builder. A Page Builder is a plugin or component of a theme that lets you structure and design web pages with minimal effort and time. Many readers will be already familiar with the HTML components of the ‘Text’ view and actual ‘Visual’ preview of the content in the WordPress visual editor.
Elementor
FIFTH: Install Essential Plugins

Now that your theme is set up, you should ADD these plugins to your website. I do this to all my new websites once they are setup
What is a Plugin?
A WordPress Plugin is a bit of a code that “plugs in” to your self-hosted WordPress website. A WordPress plugin adds new functionalities to your website or extends existing functionalities.
There are hundreds of plugins out there. These plugins will get your website started off right. Just remember, the more plugins you add, the more it will affect the performance of your website.
You can add more as your website grows. Personally, I usually start with these when I begin a new website.
NOTE: Once I have a fresh install of WordPress I delete all plugins and all hello world articles.
- Classic Editor – This is the old style of how you post an article. The newer version has an editor called Gutenberg blocks. As a beginner, I suggest you use the classic editor first.
- Security Plugin (WordFence) – This is an easy-to-use security plugin to protect your websites from threats, malware, and hackers. There is a firewall included, and the free version works well. You can also add more premium features as you begin to grow your website.
- Image Compression (Imaginify) – This plugin compresses your images to help with your website speed.
- SEO Plugin (Rank Math or Yoast SEO) – This plugin is an extension of your WordPress website to help with SEO (Search Engine Optimization), an online web analysis marketing tool. You will have to pay for extra features, but it is worth the price to get your website ranked.
- Social Plugin – If you paid for a theme, it will most likely come with a social plugin. You can use this to share your articles or videos to social accounts or have them follow you on the social accounts you created. I have been using Bloom by Divi
SIXTH: Start Collecting Emails
The best way to connect with your audience is to collect their Emails also known as creating an EMAIL LIST. You can do this via a contact form or an Email Opt-in Plugin. Once you that you can link it with an Auto Responder.
If you would like to learn more about building an Email List, click here to read about “A Simple Guide to Building an Email List”
What is an Auto Responder?
An autoresponder is a script that automatically replies to emails sent to a specific email address. It may be used for away messages, email confirmations, or for several other purposes.
SEVENTH: Add Google Analytics and Google Search Counsel
- Create a Google Analytics account
- Create a Google Search Console account
- Quickly set up a privacy policy and disclaimer for your website
BONUS: Basics of Blog Monetization
There are many ways to make money blogging – many more than I can cover in great detail on our resources page. But a few networks and services that might be a good starting point include:
- AdSense (Google’s ad network) – one of the most used monetization strategies for bloggers.
- Amazon Associates – to make money recommending products from the biggest online store.
- Genius Links – a great tool/resource for managing your affiliate links; particularly useful if you have a global audience and monetize with Amazon’s affiliate program.
I hope this helped with your journey in creating a blog. Make sure to check out my other articles on how to make your blog awesome, and on adding additional plugins to your website.
NEXT


